 Have you accidentally lost or deleted any of your Instagram posts? Want to restore it? Along with other social networking apps like Facebook, Twitter, or WhatsApp, Instagram is also one of the most popular and commonly used social media platforms. This social media app is accessed by millions of users all over the world. It is a Facebook-owned platform that offers a lot of great features to all of its users. Accessing Instagram on any device is pretty straightforward and simple. The platform keeps introducing new features for its users. In the year 2020, Instagram has added many great options for the users that include the watch together feature, disappearing messages, selfie stickers along with custom emojis, chat personalization, and much more than that. And now, this social networking service has come up with another new feature that any of its users can easily utilize.
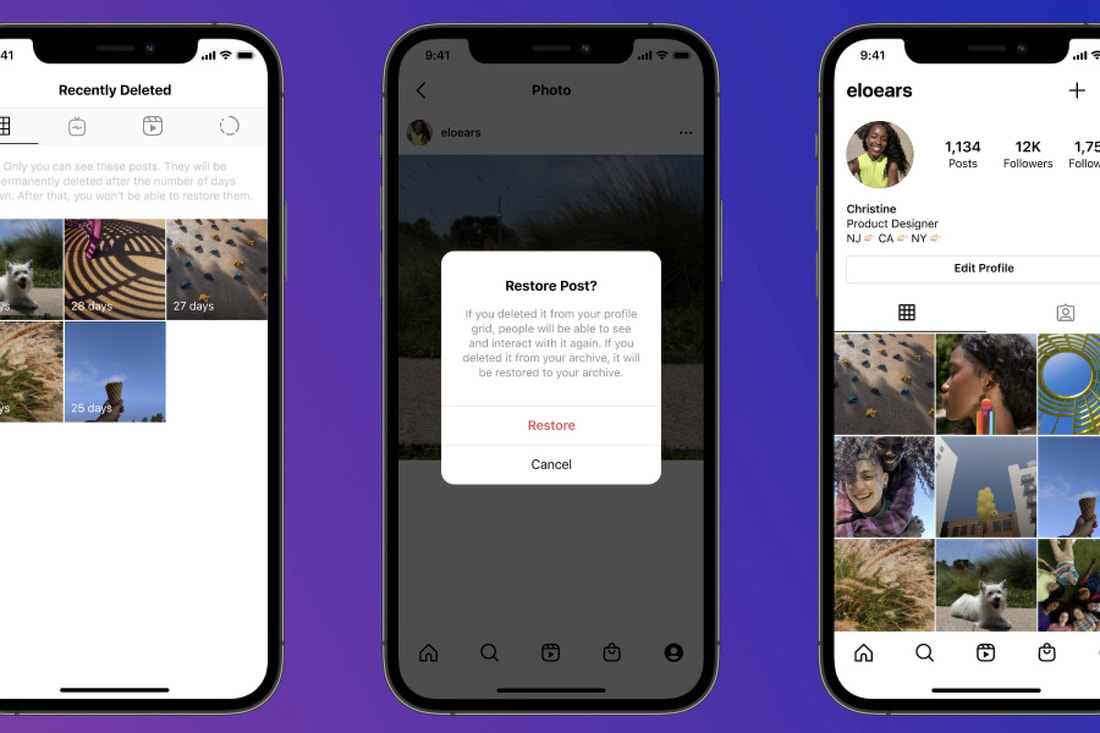
Are you also a user of this social media platform? Do you want to know how you can restore any of your deleted Instagram posts? Well, if you wish to explore this amazing functionality of Instagram, then you should consider reading this full post. The platform has recently started rolling out this feature that enables its users to restore any of their deleted posts. Isn’t it an amazing functionality? This way, you won’t have to worry about losing any of your Instagram posts anymore. And in the following article, we are going to highlight this functionality, and we will also let you know how you can access this feature to get your deleted Instagram posts back. So, please take a look at this complete post to find out how to restore recently deleted Instagram posts. All About Restoring Recently Deleted Instagram Post We all share a lot of posts on our social media accounts. And now, thanks to Instagram that has provided us with the option to restore any of our recently deleted posts. This seems to be one of the best features of this social networking site, especially in some circumstances. For instance, if your account gets hacked and the hackers start deleting the posts from your profile. And now, you can easily and quickly restore your deleted posts using this functionality. Through this functionality, one will be able to recover posts, photos, IGTV videos, stories, reels, and more. Some of the users have already started accessing this functionality. And if you also want to try out this feature, then please make sure to follow the below-mentioned instructions carefully. Also, you need to note that, for now, the app holds the recently deleted posts for up to 30 days, after which they will be deleted forever. No one else will be able to see your recently deleted posts, but as long as the post stays in the folder, it can be restored without any difficulty. Even though the functionality has started to roll out for some users, but it is also possible that at the moment, you might not see this option. In that case, you will need to update the app on your device. Or you might have to wait until the feature becomes available to you. And now, with all such discussion, it’s finally time to move towards the method for restoring the recently deleted Instagram posts. The Steps to Restore the Recently Deleted Instagram Post You will have to go through the app’s settings page to get started with the procedure of recovering recently deleted Instagram posts. Here are the steps that one must follow to access Instagram’s newly introduced functionality of restoring recently deleted posts:
So, that is how any Instagram user can simply restore their recently deleted posts using the recently deleted folder feature. However, there are various other ways as well through which the Instagram users will be able to recover their lost or deleted posts, pictures, or videos. But, this seems to be the most simple and convenient method. Try the feature now and, if you wish to know more about Instagram’s features, you can go to our website. And please stay connected to us to receive all the updates. Edward Lewis is a self-professed security expert; he has been making the people aware of the security threats. Her passion is to write about Cyber security, cryptography, malware, social engineering, internet and new media. He writes for Norton security products at norton.com/setup Source : https://s4norton.com/heres-how-one-can-restore-recently-deleted-instagram-post/
1 Comment
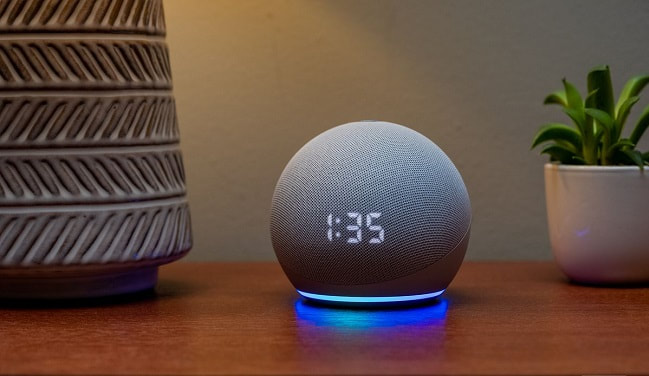 Amazon is a well-known multinational technology company that mainly focuses on providing various excellent products and services to its users. It is said to be one of the world’s most valuable brands. The company had launched its digital voice assistant named Alexa in the year 2014. And since then, millions of people have started using this digital voice assistant. It has now become a commonly used brand of smart speakers. Amazon Alexa, also referred to as simply Alexa, consists of the capabilities of voice interaction, music playback, making to-do lists, setting alarms, and one can use it for fulfilling various other purposes also. One can use Alexa to control several other smart devices too. Accessing this digital voice assistant is much easier and convenient. In order to trigger any action using this voice assistant, one needs to activate it by calling its name.
Amazon Alexa is proved to be a very handy voice assistant that makes performing any tasks much easier for anyone. The default wake word for using this voice assistant is “Alexa.” And there might be some users who might want to change its default wake word. And fortunately, the company allows the users to do so. Are you also a user of this digital voice assistant? Want to change its wake word but don’t know how to do so? If that is true, then there is no need to leave this page. You can get to see how you can change the Alexa wake word by reading this entire article. Here, we have mentioned the complete procedure through which you will be able to perform this task very easily and quickly. So, please go through the following article to get the method. The Technique for Changing Alexa Wake Word Using a Smartphone Any of the users of this smart voice assistant can quickly change the Alexa wake word using a smartphone. Or one can also do so using their speakers. To perform this task, you will have to go through this step-by-step guide. To change the Alexa wake word using your smartphone, you will have to navigate to the settings page. Now, let’s see what steps you will need to follow to accomplish the following task: The Steps to Change the Alexa Wake Word Using a Smartphone Here are the steps for changing the Alexa wake word via a mobile device:
Edward Lewis is a self-professed security expert; he has been making the people aware of the security threats. Her passion is to write about Cyber security, cryptography, malware, social is a Microsoft Office expert and has been working in the technical industry since 2002. As a technical expert, Edward has written technical blogs, manuals, white papers, and reviews for many websites such as office.com/setup. Source : https://ms1office.com/heres-how-you-can-change-alexa-wake-word-using-your-smartphone/  After WhatsApp Messenger updated its privacy policy, there are a lot of people who have started using the Signal app on their devices. The Signal app has now become one of the messaging services that people have started using more often. And now, this instant messaging platform has been considered the most secure platform. It is an end-to-end encrypted instant messaging platform, which means only the devices sending the messages and the devices receiving them will be able to see the content of the messages. This app can be pretty useful for people who work with sensitive content. It has got every functionality that can provide you with the best messaging experience. Here’s How One Can Disable Media Auto-Download in Signal for Mobile Nowadays, most of our conversations take place via sharing videos and pictures. It can be fun and interesting, but it also consumes additional storage space on our devices. And like all the other messaging platforms, the Signal app also auto-downloads the media files on your devices. Whether you are a member of a family group chat or involved in any individual conversations, receiving unnecessary images and video files can sometimes be annoying for anyone. And deleting all these media files might seem a huge task and can consume a lot of your time. So, what can you do to avoid this? Well, if you use the Signal app on your device, then there is a way through which you can disable the automatic downloading of the media files. Do you also use the Signal app on your device? Want to see how you can disable media auto-download in the Signal app? If yes, then please go through this entire post to get the technique. The Process for Disabling the Media Auto-Download in Signal Any user of the Signal app can easily disable the automatic downloading of the media files. By enabling you to do so, this platform provides you with the power to control which media files you want to download on your device and which ones you don’t. Also, by disabling the auto-download for the media files, you will be able to manage storage space on your device more efficiently. In order to perform this task, one needs to go through the app’s settings page. And to help you with this task, we have explained the complete procedure here. So, please have a look at the mentioned steps now: The Steps to Disable the Media Auto-Download in Signal Here are the steps that any Signal user should follow to disable the auto-download in the app:
Edward Lewis is a Microsoft Office expert and has been working in the technical industry since 2002. As a technical expert, Edward has written technical blogs, manuals, white papers, and reviews for many websites such as canon.com/ijsetup. Source : https://comijsetupcanon.com/blog/heres-how-one-can-disable-media-auto-download-in-signal-for-mobile/ Sharing emojis, animojis, and GIFs on various social networking platforms can be pretty fun and interesting. In fact, nowadays, more and more people share emojis in their text messages and posts. Emojis makes our conversations more lively and expressive. And all of the social media apps allow their users to share emojis within their texts and posts. And not only emojis or animojis, but sending GIFs on any social media platform is also pretty easy. But have you ever wanted to save any GIF to your device from any social networking platform? Suppose someone shared a GIF on any social media app, and you liked it so much that you wish you could save it on your device. Do you know how you can save any GIF from any social networking app to your device? Well, if you want to save a GIF from your Twitter account to your device and you don’t know how to do so, then you have come to the right place. 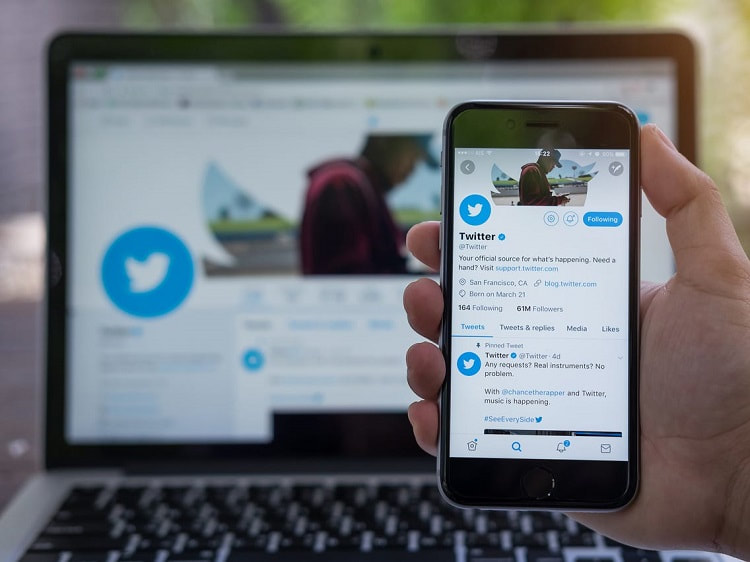 In the following article, you will get to know how you can save a GIF to your device from your Twitter account. Here, we are going to provide you with a proper procedure for performing this task. So, please go through the following post to see the method. The Techniques for Saving GIFs from Twitter on Android and iPhone Any Twitter user can easily save GIFs from their account on their Android device and iPhone. And the procedure for performing this task varies according to the device that you own. Let’s see how you can save GIFs from Twitter to your Android device. 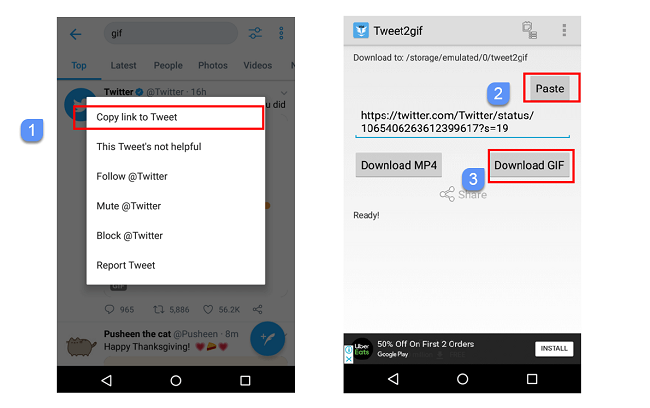 The Steps for Saving GIFs from Twitter on Android Devices Here are the steps that the Android device users will have to follow to save GIFs from their Twitter account on their device:
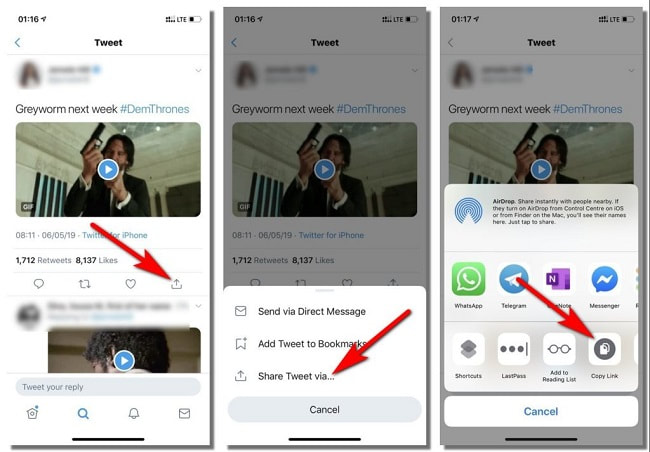 The Steps for Saving GIFs from Twitter on iPhone
Follow the steps to save the GIFs from Twitter on iPhone:
Edward Lewis is a creative person who has been writing blogs and articles about cybersecurity. He writes about the latest updates regarding mcafee.com/activate and how it can improve the work experience of users. His articles have been published in many popular e-magazines, blogs, and websites. Source : https://mcafeeactivate.uk.net/heres-how-one-can-save-gifs-from-twitter-on-android-and-iphone/ 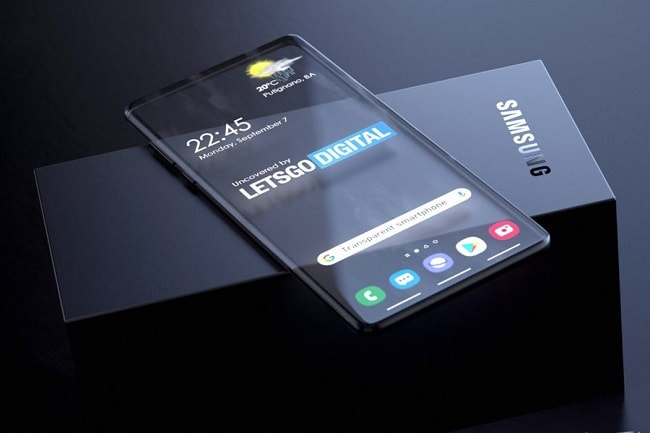 You can customize your Samsung device in many ways. There are more than ten different features, settings, and apps that can be utilized in any Samsung smartphone. There are many great applications that you can download to get a lot of different features.
Google Search Bar Widget Click on the Google search bar available on your Samsung device. Then click on the more option. Here you will get the option to customize the widget. However, in some regions, you cannot customize your widget. The first option will allow you to change the word Google into G. Users can select the shape of the widget box. They can choose between rectangular or rounded corners and choose the transparent, bright, and dark color theme. You can also customize it to a completely different color via tapping the last option. After the Google search widget customization, click on the done button on the top of your display screen. Quick Panel Layout Open your quick panel on the device and click on the three dots. After that, select the quick panel layout option. Here you will get the option to show or hide brightness control above notifications, devices & media buttons, and you can also choose to show it above the notifications. Users can also edit buttons on the quick panel layout. You can show or hide current buttons. Control Center The Control Panel application is functional and helpful. You will get the option to your one-touch controls such as BlueTooth, Wi-Fi, Torch, etc., on the side panel. There will be a lot of things inside the control panel. You can download the Control panel application from the Galaxy Store application, and the application is made by EdgePro Team. Recent App List Users can download the One Hand Operation Plus application from the Galaxy store or Play Store. You can set the settings according to the left or right-hand side. You can even change how many items you want on the recent screen by tapping the Task switcher option. The app also has advanced settings, and it includes animations, changes the arrow colors, and a lot more settings. Users can adjust the task widget size between small, large, and medium. The application allows you to go through your recent application a lot quicker than the default one. Assistant Sound Setting You can always download and customize your Sound Assistant. You will get the option to change the volume panel theme. Users can also see the different color options. Under the advanced setting option, users can select the app to control music. Users can download more applications from the Galaxy store or App store. Motions & Gestures This setting is available inside your phone settings. You can find it under the advanced setting options. It will allow you to edit a lot of cool features. You can select the option to turn on or off your screen when you double-tap it. By allowing this setting, you will not have to press the power button to check the time or other notifications. However, this feature will consume more battery than usual. Good Lock Users can change the look of their device by changing the grid size. They will have to tap & hold anywhere on the home screen. Now go inside the settings. After that, you will get the option to customize the home screen layout, home screen grid, apps screen grid, folder grid, and a lot more options. If you are not satisfied with the default grid size, then you can download the Good Lock application. Inside the Good Lock application, you will get the Home Up option. Inside the Home Up option, you will get a lot of options such as Home screen, Folder, Backup &restore, Share Manager, Task changer, etc. Click on the folder option, and you will get the Folder grid option. Now you can set up the Folder icon and Folder screen settings. LockStar & QuickStar Good Lock application also includes two sections Lockstar and QuickStar. Users can fully customize their lock screen with the LockStar turned on. Users can move around the clock and other icons under the lock screen. You can also edit the landscape lock screen. You can also edit shortcut icons on the lock screen. If you have customized it completely, then press the save option to make the changes. In QuickStar, users can change their indicator icons, clock settings, quick panel, and quick button grid. You can toggle on or off different default indicator icons. Users can change the position and visibility of their clock between left and right. It also has the option to show AM or PM along with the time. Conclusion These are some of the few settings that everyone can use to customize their Samsung devices. You can change the complete layout of your device’s user interface. These features will make your device unique and easy to operate. Edward Lewis is a Microsoft Office expert and has been working in the technical industry since 2002. As a technical expert, Edward has written technical blogs, manuals, white papers, and reviews for many websites such as canon.com/ijsetup. Source : https://pagesix.uk.com/different-ways-to-customize-your-samsung-smartphone/ 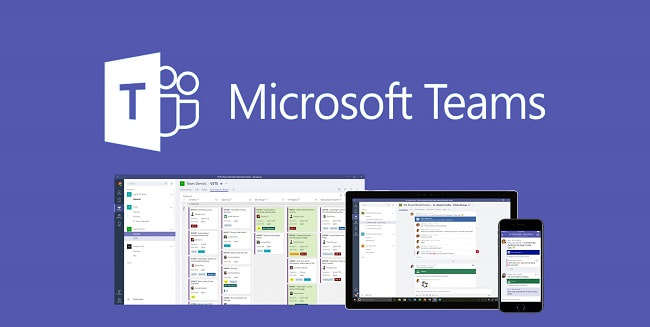 Microsoft Teams allows the host of a meeting to lock meetings and restrict for late-comers in the app. In this blog, you will learn how you can lock meetings in Microsoft Teams so that late-comers can’t join meetings. Everyone is taking meetings and scheduling classes online nowadays after the covid pandemic. They all take meetings in the Microsoft Teams app that catered to their needs efficiently.
Now, even in the meetings, the Microsoft Teams participants will have the lock feature. The late-joiners disturb the flow of the meeting and cause trouble to the business occurring at the meeting. The host can now lock the meetings and stop participants from joining the late-comers in the meetings. Check how to lock meetings in Microsoft Teams. Steps to Lock Meetings in Microsoft Teams If you want to use this feature, you need to follow the below pointers. These pointers will surely help you to lock meetings in Microsoft Teams.
Using the above steps, you can unlock and lock meetings in Microsoft Teams. How to lock a meeting in the Microsoft Teams app? If you want to lock a meeting, you must be an organizer and host of the meeting. You can see the participants option on the meeting screen, click on it, and open the participants’ icon. Now, press the three-dot menu and choose Lock the meeting. Is there any time limit on Microsoft Teams meetings? The time limit of meetings on the Teams app is 24 hours. If you joined a meeting using Meet now on the Windows 10 or 11 taskbar. Now, the time limit has been fixed to 8 hours. The time limit for Live events on the Teams app is 4 hours from the start time. How to put Microsoft Teams meetings on hold? You can put Microsoft Teams meetings on hold anytime and resume the meeting back. Everyone will get a notification when the meeting is put on hold. Conclusion Microsoft Teams is a popular app for scheduling office meetings and online classes. It is used by many users rather than attending physical seminars after the covid pandemic. We must have seen many late-comers in meetings who disrupt the meeting or business. Microsoft Teams app has a lock feature that enables users to lock meetings anytime. It helps the users not to allow late-comers to join the meeting. Potter Henry is a Microsoft Office expert and has been working in the technical industry since 2002. As a technical expert, Edward has written technical blogs, manuals, white papers, and reviews for many websites such as setup.brother.com. Source : https://downbrothersoft.com/blog/how-to-use-lock-feature-on-microsoft-teams-app/ 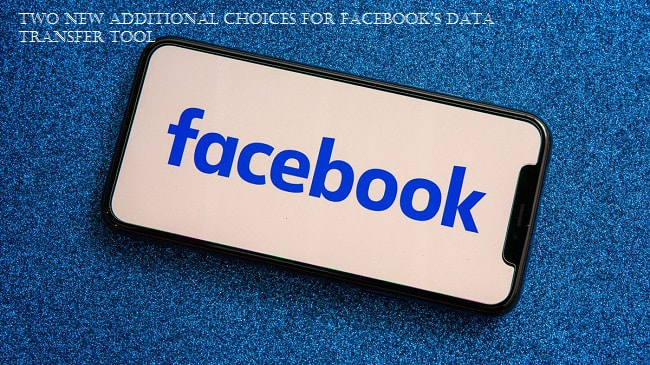 Facebook users exchange a lot of data, from ideas to images and videos. Facebook also gives its users the option of transferring this information to other services. The company has enhanced Facebook’s Transfer Your Information (TYI) feature, making it a more effective tool for transferring user data. According to Facebook, users will have more control over their data after implementing the new update.
Improved and transparent data transfer Facebook users will now be notified before sharing data about the file formats allowed by each destination. Users will now have more transparency about each data transfer from the platform while moving data from the platform. It will also be easier for them to retry if any transfers are canceled as a consequence of this agreement. Users may now initiate several data transfers to the same destination at the same time if they choose it. With improved methods and transparency, data will move safely and securely. Two options for Destination Aside from that, the social media giant has added two additional locations to transmit information about Facebook profiles. Photobucket and Google calendars are examples of such services. Customers already have access to Google services such as Google Drive and Google Photos. This implies that users will be able to sync information about Facebook events with their calendars in the future. Specific data may now be selected and filtered more easily with the assistance of new choices that have been included. Users are going to find this addition in Facebook useful as with more choices, they’ll be able to utilize the app effectively. Information is given through a Blogpost In addition to data type and their choices, Facebook said it is working with developers to expand destination support. Regardless, the firm claimed it followed the government’s required regulations and standards to guarantee customer data is transferred safely. Data privacy and security is a major concern related to social media, as the companies sell it to advertisers. With this assurance, Facebook’s users will feel more relaxed and secure with their data. Development going on with the new Project Facebook has said that the firm is working on its open-source data transfer initiative in order to make data portability easier and to allow more people to benefit from technological advancements. This project is becoming more intertwined with other services. By this statement, we can easily understand that in the future, more collaborative efforts and service integrations are coming on Facebook. New privacy shortcuts from Facebook The newly designed settings page in the Facebook mobile app now includes a privacy shortcut. This update will make it simpler to make the necessary changes to the privacy and security settings. With shortcuts, the social media platform will decide if users have full control over their posts, comments, and content shared with others. Users can simply control who has access to and may react to their content. Redesigned Mobile Settings Page Facebook also redesigned the mobile settings page. The new design is less crowded, and individual options don’t have explanations so that you can see more on the page. Facebook has also reorganized its settings. The business has reduced the settings sections from nine to six: Account, Preferences, Audience and Visibility, Permissions, Your Information, and Community Standards and Legal Policies. Facebook claims certain settings have been rearranged to be more intuitive. The new design is coming to Android, iOS, mobile web, and Facebook Lite. Edward Lewis is a Microsoft Office expert and has been working in the technical industry since 2002. As a technical expert, Edward has written technical blogs, manuals, white papers, and reviews for many websites such as canon.com/ijsetup. Source : https://canon.comijsetupmanual.com/two-new-additional-choices-for-facebooks-data-transfer-tool/  YouTube shorts is the same thing as TikTok and also Instagram Reels, where the videos are short, and also attention-grabbing are fun. So, there can be different reasons for downloading YouTube shorts. For example, if you have deleted the original video from your phone or must have forgotten the password of your channel. In such a case, you still have the option to download YouTube Shorts videos without logging in to the account.
How to download videos from YouTube Shorts?
You have to open the YouTube Studio on your system to download your own YouTube Shorts video. Firstly, log in to the YouTube account where the video is posted. You will see the Content tab on the left side; click on it. When you do so, all your videos, including regular and Shorts, will appear. Navigate the mouse over to the video you want to download and click the three-dot icon. From the menu, select Download.
There is a native way through which you can download regular videos as well as Shorts. You can view such videos in offline mode only, but it will still open in the YouTube app. This means that they are not downloaded to your gallery, so you cannot share or view them outside of the app. You will not find a download button in Shorts, so we have to download them in a workaround way. The steps are as follows:
You have the option to download YouTube Shorts video to your smartphone’s gallery on Android as well as iPhone. This can happen with the help of YouTube video downloading websites. Through these videos, you can download Shorts as well as Regular videos. The method for Android is as follows:
If you wish to download videos like Instagram reels or similar ones. Then you can install an app for the same from Play Store or App Store, but it does not apply to YouTube shorts. However, we have the option of open-source video downloader apps like New Pipe, through which you can download videos from YouTube Shorts.
Conclusion By following these four ways, you can download YouTube shorts. However, there is a chance these websites may shut down or won’t work in the future because of copyright issues. Then, you can use other methods. Edward Lewis is a creative person who has been writing blogs and articles about cybersecurity. He writes about the latest updates regarding mcafee.com/activate and how it can improve the work experience of users. His articles have been published in many popular e-magazines, blogs, and websites. Source : https://helpmcafee.uk.com/this-is-how-you-can-download-youtube-shorts/ Serafim has support for mobile phones to gaming consoles. It is also compatible with 10 different platforms. As a result, you can enjoy your favorite games with this controller. The application also has optimized mopping buttons for popular games like PUBGM and Injustice 2.  Design & BuildThe controller has nice rubber to protect itself. The button click sound is also pretty nice. It also has a vertical place to keep your device, and after that, you can play games on your device. You will get a power button and charging port on the top of the controller.
The Serafim S1 controller provides two analog sticks and 14 buttons. You will be able to customize the sensitivity and dead zone settings as well. It is pretty lightweight and compact in size. Setup & Application You can turn on the controller by pressing the power button on top of it. The controller also has a dedicated app named Serafim Play. You can download it from the Play Store. You will have to register your accessory after opening the application. The application also allows you to download the games and play them. The controller uses BlueTooth technology to connect with your smartphone device. First, open the Serafim Play application, and after that, select the S1 controller option. After that, make sure the controller is connected. You can also check the pairings and open the customization interface. Connect With Your PC You can also connect it with your PC or laptop if it is compatible with BlueTooth technology. However, the Serafim dongle is required to connect it with your PC. After connecting the dongle to your computer, you will get a notification about setting up the controller device. After the installation of the controller driver, you can use the controller with your PC. However, you will have to change the setting inside your game settings. Compatible Games However, it is only compatible with certain games such as Stadia, Epic games, Battle.net, and streams. In short, there are just certain games that are allowed with the controller. You will also get a better feel and never miss a beat of your games. The Serafim Play app also supports multiple top games. You can add new games inside the application via tapping the add option then enter the game. Features This controller has a few unique features such as vertical positioning, multiple devices, and streaming. It also has automatic tapping over 20 times per minute. This feature is really essential, and it does not affect your thumb anymore. It also includes a pre-set button placements. You can also tap the floating icon to customize the setting. Users can tap the buttons and drag them to their favored position. You can also change and save the settings. Some features are listed below:
The Serafim S1 controller provides up to 20 hours of battery life on a single charge. Price The Serafim S1 Controller will cost you about $300. You will also get a USB plugin, USB-C cable, and the gaming console itself. You can also check the price on the official website as they keep changing over time Edward Lewis is a self-professed security expert; he has been making the people aware of the security threats. His passion is to write about Cyber security, cryptography, malware, social engineering, internet and new media. He writes for McAfee security products at mcafee.com/activate. Source : https://help8mcafee.uk.net/serafim-s1-controller-review-lightweight-and-compact-in-size/ |
AuthorWrite something about yourself. No need to be fancy, just an overview. Archives
August 2021
Categories |
 RSS Feed
